Learn |
The command line seems imposing, doesn’t it? It just sits there, waiting passively. With just a blinking cursor and not much more, it seems unintuitive. It’s actually quite intuitive, but to appreciate that you need to change how you think of a user interface. Let’s take a tour of the command line to do that.
What you’ll learn
By the end of this tour, you’ll have more confidence to actually do things that automate your tech writing. You’ll learn what the parts of the command line are and how to enter commands.
GUI guardrails
A GUI is great. Need to italicize a few words in a document? A couple of clicks, maybe a key press, and you’re done in less than 5 seconds.
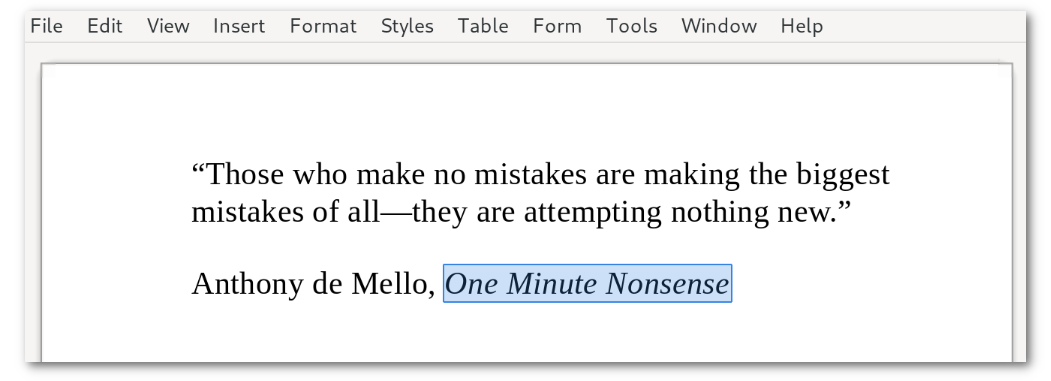
The GUI does a lot to make things simple and obvious for you. But it also deliberately limits how you interact with it, with lots of colourful, animated guard rails. Yeah, it lets you work on a few things in a few specific ways, but it also gets tedious when you have to repeat something more than a few times.
Need to italicize the same words in 100 documents? You’re going to click a lot more and you might miss a few documents. If your hands aren’t too sore, call a physiotherapist while you’re at it.
Then there’s the command line interface (CLI). The CLI imposes no limits on what you can work on or how you do it. A CLI lets you mix, mash, slice, and dice anything you can get your hands on. In other words, a CLI removes the guardrails.
What you’re getting yourself into
You’ll be bumping into walls as you learn this new way to interact with a computer. You’ll notice things that don’t map onto your experience with GUIs. But that’s ok! It’s ok.
As you start out, the command line will look and act weird. But you’ll eventually see how it’s more powerful, concise, and expressive than anything you’ve done with a GUI.
You won’t break anything, I promise
Don’t worry about breaking things because there’s nothing to break. You’ll be working in a safe, cozy, fun sandbox. Anything you do in it doesn’t affect the rest of your computer.
Some terminology
Before we get our hands dirty, let’s be clear about what we’re talking about:
- command line
- aka command line interface, aka CLI. From now own we’ll use this term to mean the kind of human-computer interface we’ll be using. Think of this as an alternative to a graphical user interface (GUI).
- shell
- What developers (and now you too!) call the actual application that lets you enter commands on the command line. Think of a shell as the command-line counterpart to macOS Finder or Windows Explorer, which are GUI-based applications. Like Finder and Explorer, you use the shell to do things like run commands and navigate around your directories.
- Bash
- There are many shells out there with the most popular of them sharing a similar heritage, command syntax, and features. Among these shells, GNU Bash is pretty much the lingua franca of shells. More people and machines use Bash than any other shell.
Step 0: What you’ll need
Before you take this tour, you need to set up a few things:
- Install Tech Writer Tools.
- Er… that’s it
Step 1: Start the command line
Do this: Launch the Docker Desktop application.
Do this: Open a terminal application:
- Linux: Press the Meta (aka Windows) key, search for terminal.
- macOS: Press Command (aka ⌘) + Space, search for terminal.
- Windows: Press the Windows key, search for terminal.
Do this: In the Terminal app, without pressing Enter, type this command exactly as you see it, then double-check it, then triple-check it. Don’t copy and paste.
Do this: When you’re absolutely sure you’ve type in this command correctly, press Enter.
docker run -it egopontem/techwritertools:latest
There’s a reason why I asked you not to use the clipboard. We’ll cover that later.
Parts of a command line
If everything went well, you’ll see something like this in the Terminal app:
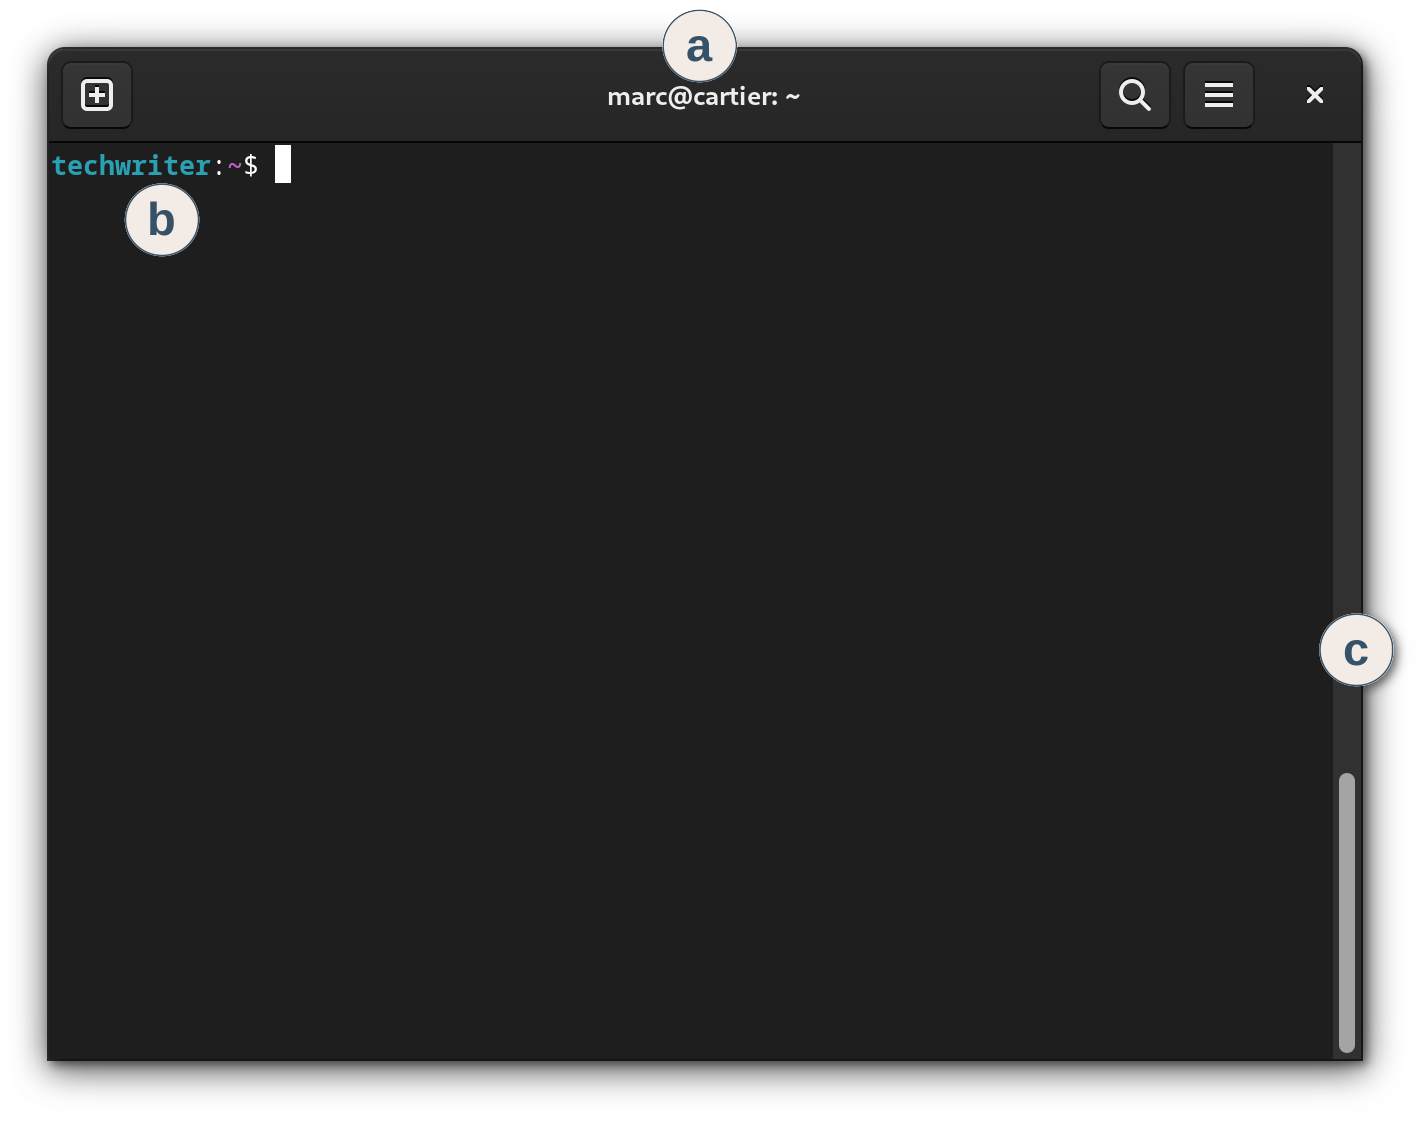
a Any GUI user knows what this is. It’s an application window. In this case you’re looking at GNOME Terminal on Debian.
b This is the prompt. The prompt is what the shell shows you to tell you that it’s ready for your next command:
- techwriter: Your username. In this case it’s techwriter, the default username in Tech Writer Tools.
- :: A separator
- ~: The current directory. The tilde (~) is the shell’s shorthand way to specify your home directory.
- $: The end of the prompt, where you type your command.
c The scroll bar. Again, you know what this is but keep in mind that scrolling works a little differently in a Terminal window. It looks like a text document, but it’s (mostly) not.
Entering commands
You’ll be entering commands in a moment. Here’s what I mean by “entering” a command: type the command’s text in the Terminal app then press the Enter key. When I use some other word, like “type”, instead of “enter”, then type the command without pressing Enter.
Step 2: Shell, Terminal. Terminal, shell
The Terminal app lets you interact with the shell. The shell lets you interact with your computer. To see the difference between them, let’s experiment a bit.
The shell, being a child of the 1960s, is very much into the now. It doesn’t care about the commands you entered in the past. That means that the part of the command line that you work on is always at the shell’s most recent prompt.
Also, most of the keys you press on the keyboard go directly to the shell instead of the Terminal app. What does this mean? Let’s see.
Do this: Press Enter a few times.
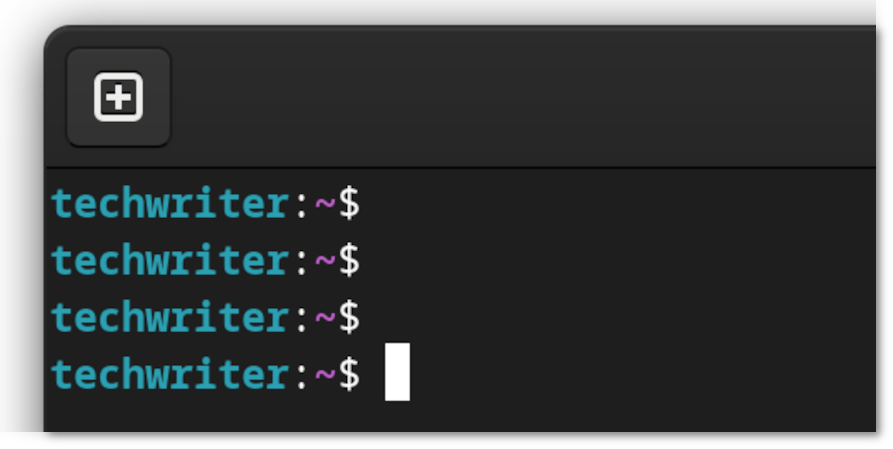
What happened: Nothing much, except for a few new prompts. You didn’t tell the shell to do anything, so it just output a fresh prompt each time you pressed Enter without a command.
Do this: With your mouse or trackpad, select the username in the first prompt so that it looks like this:
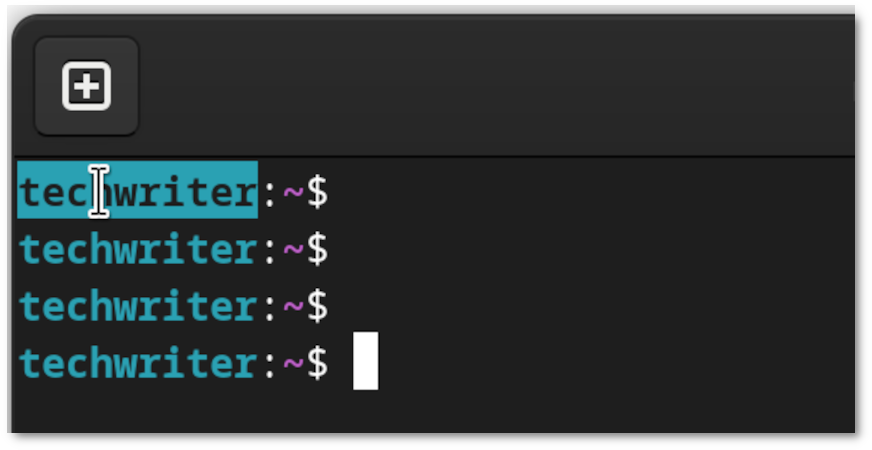
What happened: Nothing much, except that techwriter is selected.
Notice something weird? You’ve selected text in the Terminal app but the cursor is still blinking at the end of the most recent prompt.
Two things are happening:
- The Terminal app provides some modern GUI features for your convenience. The scroll bar, and mouse or track pad, belong to the Terminal app. You can use them to see your previous work and select text anywhere in the window. The Terminal window acts a lot like an editor window, you can see and copy text into the clipboard. But you can’t edit previous results like you would in a word processor.
- The shell, on the other hand, is still waiting for your command at the end of the most recent prompt. To the shell, yesterday never happened, man.
Step 3: Your first mistake
Let’s get this over with right now. I’m going to ask you to make a mistake on purpose.
Do this: At the command line, type (don’t press Enter yet) this command exactly as you see it.
echoing Hello, world!
What happened: Nothing except that the shell is waiting for you to finish entering your command. Your terminal will show this with the cursor blinking at the end of what you typed:
techwriter:~$ echoing Hello, world!▮
Do this: Press Enter.
techwriter:~$ echoing Hello, world!
bash: echoing: command not found
techwriter:~$ ▮
What happened: Your first mistake! Failure! Sorry, let’s spin that: you discovered that echoing is not a command. Success!
Our shell, Bash, gave an error message telling you that it doesn’t know what echoing is.
As you’ll discover, the commands you enter will either do what you mean, do what you say, or give an error. The goal of learning about the command line is to make “mean” and “say” intersect as much as possible. To do that, you’ll be seeing errors along the way. And that’s ok. It’s ok.
Step 4: A short history of the shell and terminal
I kind of lied about the shell’s ignorance of what you’ve done previously. The shell actually does care about the past, but in a specific way.
In a GUI text editor, you use the arrow keys to move the cursor around, up, down, left, and right. Even though the Terminal provides the scroll bars and reacts to the mouse, the arrow keys belong to the shell.
In the shell, the arrow keys work a little differently.
Do this: Press the Up key once (and don’t press any other keys).
techwriter:~$ echoing Hello, world!
bash: echoing: command not found
techwriter:~$ echoing Hello, world!▮
What happened: The shell shows the previous command you’ve entered as if you’ve typed it yourself.
The Up arrow key shows previous commands, which is what the shell calls your history. The shell history records previous commands you’ve entered. Note that the history doesn’t contain the results from those commands, only what you’ve entered. You use the Terminal app to see previous commands with their results.
Do this: Press the Left key a few times so that the cursor is at the space after echoing. Don’t press any other keys.
techwriter:~$ echoing Hello, world!
bash: echoing: command not found
techwriter:~$ echoing▮Hello,world!
Do this: Press Backspace to delete the ing in echoing. Don’t press any other keys.
techwriter:~$ echoing Hello, world!
bash: echoing: command not found
techwriter:~$ echo▮Hello,world!
What happened: You’ve just edited a command. You started with a previously-entered command then modified it into a new command. You’ll find yourself doing this a lot, it’s a time saver.
Do this: Press Enter.
techwriter:~$ echoing Hello, world!
bash: echoing: command not found
techwriter:~$ echo Hello, world!
Hello, world!
techwriter:~$ ▮
What happened: Success! The echo command outputs the text that follows the command.
You can also use the Down and Right arrow keys to move around the history and the command line, respectively.
Do this: Press the Up, Down, Left and Right arrow keys a few times to play around the history and edit the command line.
Step 5: The shell’s Cancel button
Like I brought up earlier, you’re going to make mistakes. Actually, let’s spin that a bit: You’re going to discover what doesn’t work. Better, right?
Sometimes you’ll get stuck and just want to return to a new prompt. You can do this with the shell’s equivalent to a GUI’s Cancel button.
Let’s try it.
Do this: Enter sleep 10 then wait 10 seconds.
techwriter:~$ sleep 10
▮
What happened: Nothing much, except that after pressing Enter, no shell prompt appears until 10 seconds have elapsed.
Do this: Let’s try this again. Enter sleep 10 (or use the shell history!) then immediately press Ctrl + C.
techwriter:~$ sleep 10
techwriter:~$ sleep 10
^C
techwriter:~$ ▮
What happened: You got a prompt the moment that you pressed Ctrl + C. Notice the ^C just before the fresh, new prompt.
Ctrl + C belongs to the shell. It tells the currently-running command to stop and return to the shell.
Windows and Linux users will probably ask why Ctrl + C doesn’t copy to the clipboard. The answer: Like I said, Ctrl + C belongs to the shell, and there was no such thing as a GUI clipboard in the 1960s. We’ll get to the clipboard in the next step.
To acknowledge your keypress, the shell outputs ^C. Think of Ctrl + C as the Cancel button in a GUI dialog, but you can use Ctrl + C whenever you want, the command-line will recognize it most of the time.
By “most of the time”, I mean that Ctrl + C actually sends an interrupt signal to the command that’s running. Most commands respect this interrupt signal, but sometimes a command will interpret it differently. For example, a command-line-based text editor might treat Ctrl + C as a text editing command.
Step 6: The clipboard belongs to the GUI
You can still copy and paste with the clipboard. But remember that the clipboard is a GUI thing, so it belongs to the Terminal app. That means you use Terminal’s menu commands, right-click, or use a special keyboard shortcut that doesn’t belong to the shell.
Let’s try it out to give you a feel for using the clipboard.
Do this: Copy the command below into the clipboard. That means selecting the text in this browser window and choosing Edit > Copy in the browser.
echo Know the place for the first time.
Do this: In the Terminal app window, do one of these to paste the clipboard:
- Windows: Right-click alone, or press Ctrl + Shift + V.
- Linux: Right-click and choose Paste. Or press Ctrl + Shift + V, which most Terminal apps in Linux also support.
- macOS: In the menu bar choose Edit > Paste, or press ⌘ + V.
What happened: The clipboard’s contents appear at the prompt as if you’ve just typed it.
techwriter:~$ echo Know the place for the first time.
Do this: If you haven’t already, press Enter.
techwriter:~$ echo Know the place for the first time.
Know the place for the first time.
techwriter:~$ ▮
You can also copy text from the Terminal app into the clipboard.
Do this: In the Terminal app, select any ol’ text you want, a character, word, or multiple lines. Then do one of these:
- Windows: Press Ctrl + Shift + C.
- Linux: Right-click and choose Copy. Or press Ctrl + Shift + C, which most Terminal apps in Linux also support.
- macOS: In the menu bar choose Edit > Copy, or press ⌘ + C.
Do this: In a GUI text editor or word processor, paste the clipboard to see what it looks like.
In the Terminal app, you can’t cut something into the clipboard. First of all, it doesn’t make much sense: the shell has a limited awareness of what happened before. Also, from a user interaction point of view, it makes more sense to keep previous commands and results intact.
You did it!
Congratulations, you know how to work with the Terminal and shell.
What you learned
- The Terminal app is a GUI app that shows the commands you’ve entered and their results. It provides some GUI conveniences for scrolling through and looking at your previous interactions.
- The shell is the command-line app that accepts your commands. The commands you enter show their output, if any, after the command that you enter.
- When it’s ready for your next command, the shell outputs a prompt. You always enter your next command at the most recent prompt.
- The shell history records your previous commands (but not their results). You can navigate the shell history with Up and Down.
- You can edit the current command with Left, Right, and Backspace.
- If you’re stuck and just want to get a fresh prompt, press Ctrl + C.
- The clipboard belongs to the GUI. To copy and paste, you use Terminal features like menu commands, right-clicking, or special keyboard shortcuts that don’t belong to the shell.
Next step
Congratulations! You’re ready to do something useful now.